Descri Tion of Different Themes Options for Apple Picture Books
Enjoying photos nowadays involves at a screen, be it a phone, tablet, computer display, or a TV. But there's something to be said about printed photo albums. These books provide convenient access, but more important are the sentiments attached to them. There's something about experiencing how the photos are presented, seeing the photos in print, leafing through pages, and holding something tangible that gives photos weight, literally and figuratively.
It's quite easy to make a photo book on your Mac, using Apple's Photos app, which is located in the Applications folder. Here's how. (Learn more about Apple's photo books and other print products.)
Import your photos
If you haven't done so, you need to import your photos into Photos. If they are on a storage device like a hard drive or USB drive, you can select all the photos on the device, and then drag them over to the open Photos app.
To import your photos on your iPhone into Photos, follow these steps.
Import iPhone photos into the Photos Mac app
 IDG
IDG 1. Plug in your iPhone to your Mac using a Lighting-to-USB cable.
2. Launch the Photos app (Applications > Photos).
3. In the left column of Photos, your iPhone should appear under Devices. Click it.
4. Thumbnails of your iPhone photos will appear in the main window. At the top of the window is an Import to pop-up menu. The Default is Library, but you can select a specific Album to import to, or create a new Album.
It's best to put the Photos for your book in an Album in the Photos app. This will make it a lot easier to inspect the book's contents. If the Album you want is already in Photos, select it in the pop-up menu. To create a new Album, select New Album. You'll be asked to give the Album a name, and then it will be selected as the destination for your import.
5. You can click the Import All New Items button, or you can select the photos you want to import by clicking on each one and then clicking on Import Selected.
If you want Photos to open every time you connect your iPhone to your Mac, check the Open Photos for this device box next to the icon and name of your iPhone in the upper left corner of the main window.
Also, note that after you perform an import, the photos are still on your iPhone. They haven't been deleted. There is no option in Photos to delete the photos on your phone after import.
How to create a photo book in Photos for Mac
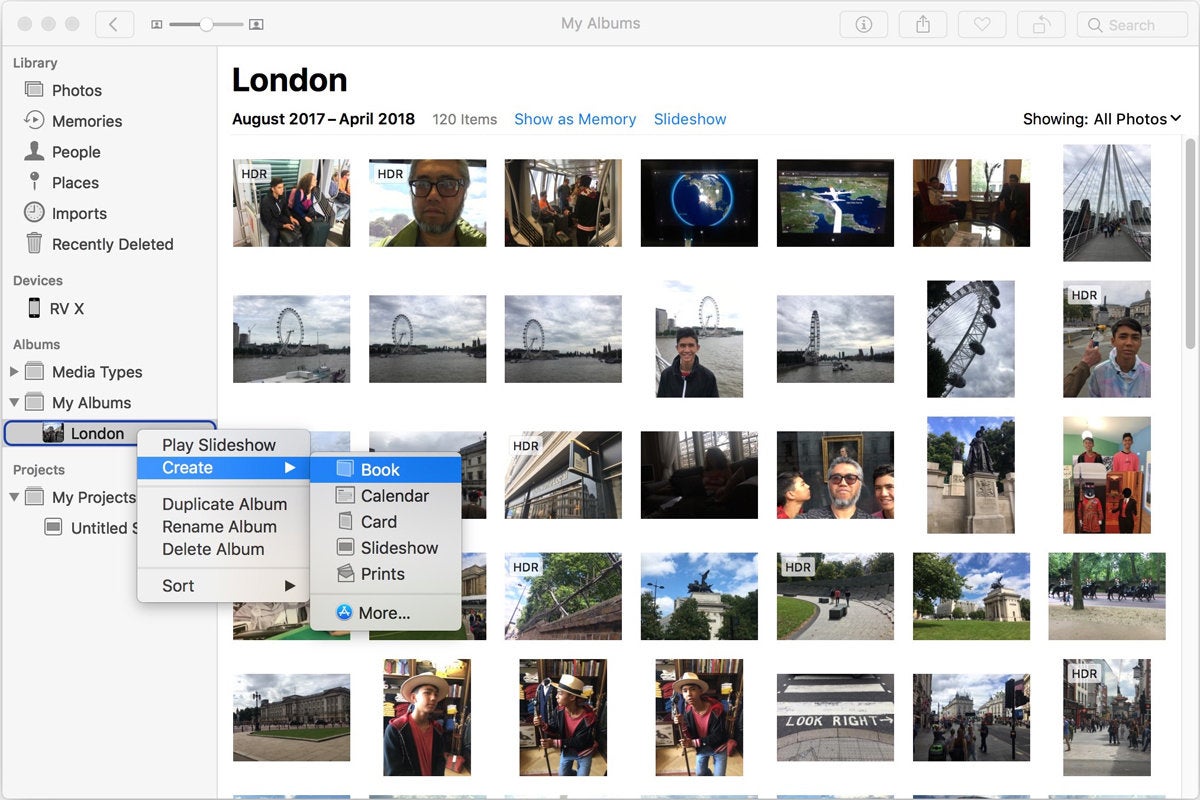
1. Select the Album that has your photos for the book. This is done by going to the Albums section in the left column. Click the triangle icon next to My Albums to see your album collection.
(If you didn't put your photos in an Album, you can go into one of the Library categories in the left column (Photos, Memories, People, etc.), select the photos you want, and then create your book.)
2. Right-click on your Album. A pop-up menu will appear. Select Create > Book.
 IDG
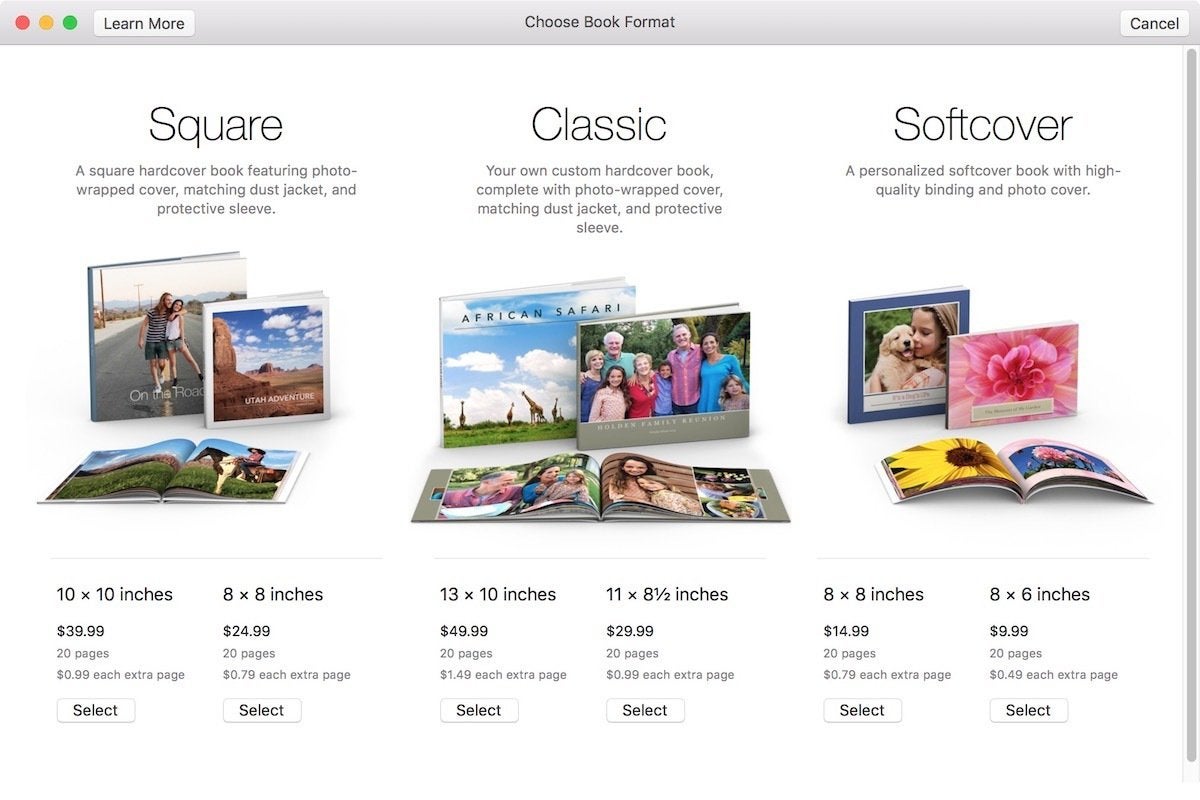
IDG 3. Photos will display your book choices and prices. Look them over, and when you decide which one you want, click its select button.
 IDG
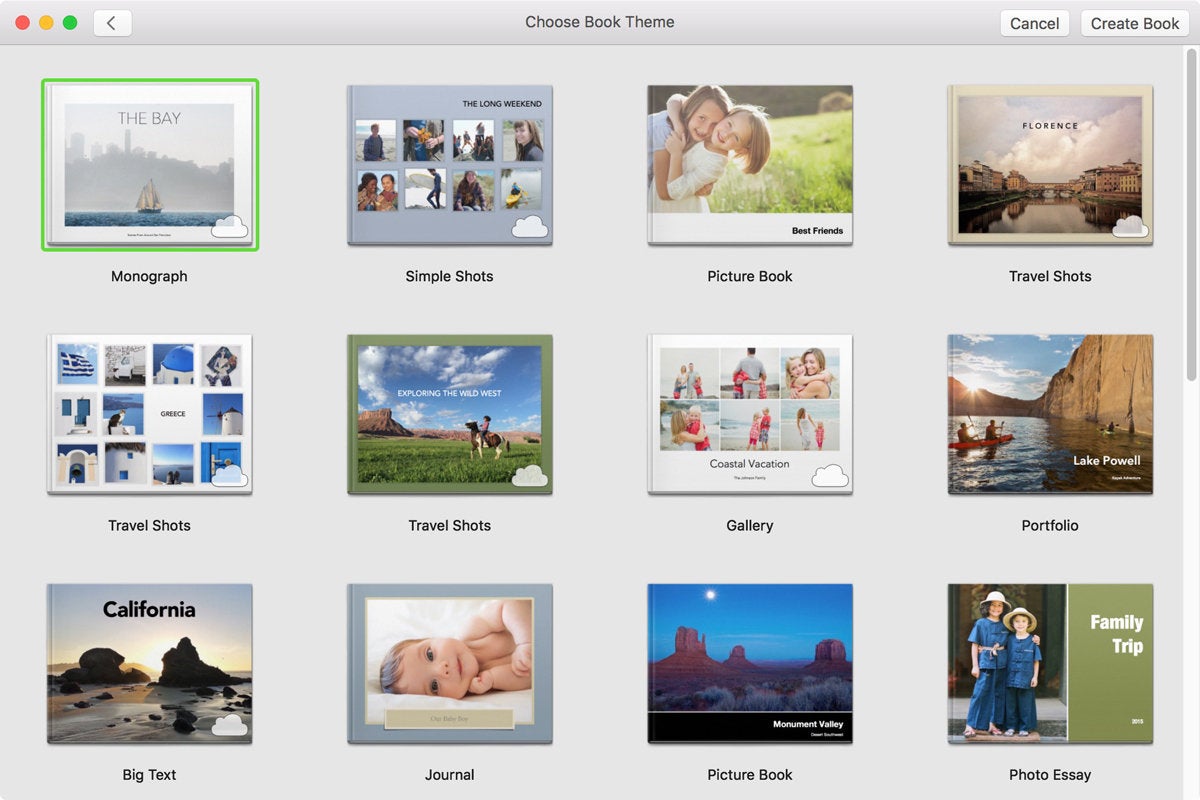
IDG 4. After you select a format, you have to choose a theme. Unfortunately, Apple doesn't provide a complete guide to what the themes look like. Here is a guide to some of the themes, provided by Apple's Support Communities. You can change a theme later if you don't like the one you pick.
 IDG
IDG Select a theme and then click on the Create Book button on the upper right of the app.
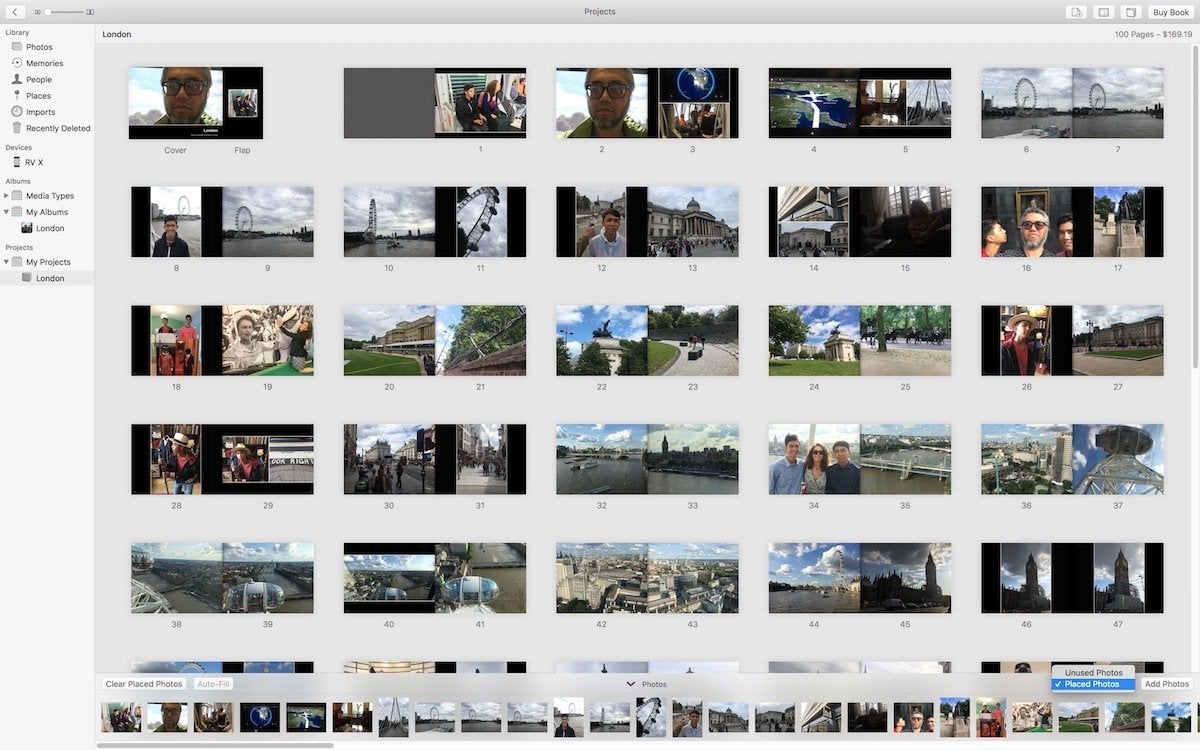
The Photos app will create a project and automatically places the photos in the book. When it is done, a new project will appear in the Projects > My Projects section in the left column. The main window shows the pages of the book.
Next page: Editing your photo book
How to make changes to a photo book in Photos for Mac
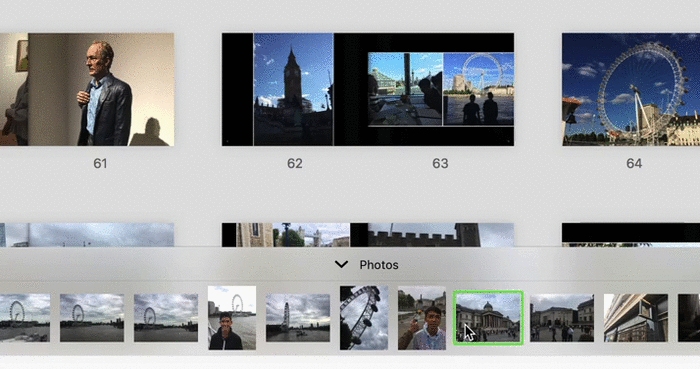
At the bottom of the main window, you'll see ^ Photos. Click to expand this section. This area allows you to access your photos so you can make changes.
 IDG
IDG - Add Photos takes you to your photo library, where you can select photos that are missing from your book.
-
The Unused Photos button is actually a pop-up menu. Click it, and you also get a Placed Photos options. If Unused Photos is selected, any photos in the Album that aren't in the book appear in the area below the button. If Placed Photos is selected, the photos in the book appear.
-
The Clear Placed Photos button removes all the pictures in the book.
-
The Auto Fill button automatically puts the photos in the Album into the book.
How to replace a photo
You want to replace a photo on one of the pages. Here's how.
 IDG
IDG 1. In the main window, scroll to the page that has the photo you want to replace.
2. In the Photos section at the bottom of the page, find the photo by using Unused Photos, Placed Photos, or Add Photos, as described above.
3. Once you find the photo you want, click on it and drag it to the photo you want to replace. If there are multiple photos on a page, make sure the one you want to replace is highlighted.
How to move a page
To move a page to a new location, click on the page number and then drag to the location where you want to put that page.
 IDG
IDG How to modify a page layout
Right-click on a page and a Layout Options menu appears. Select it, and you will see your options for that page.
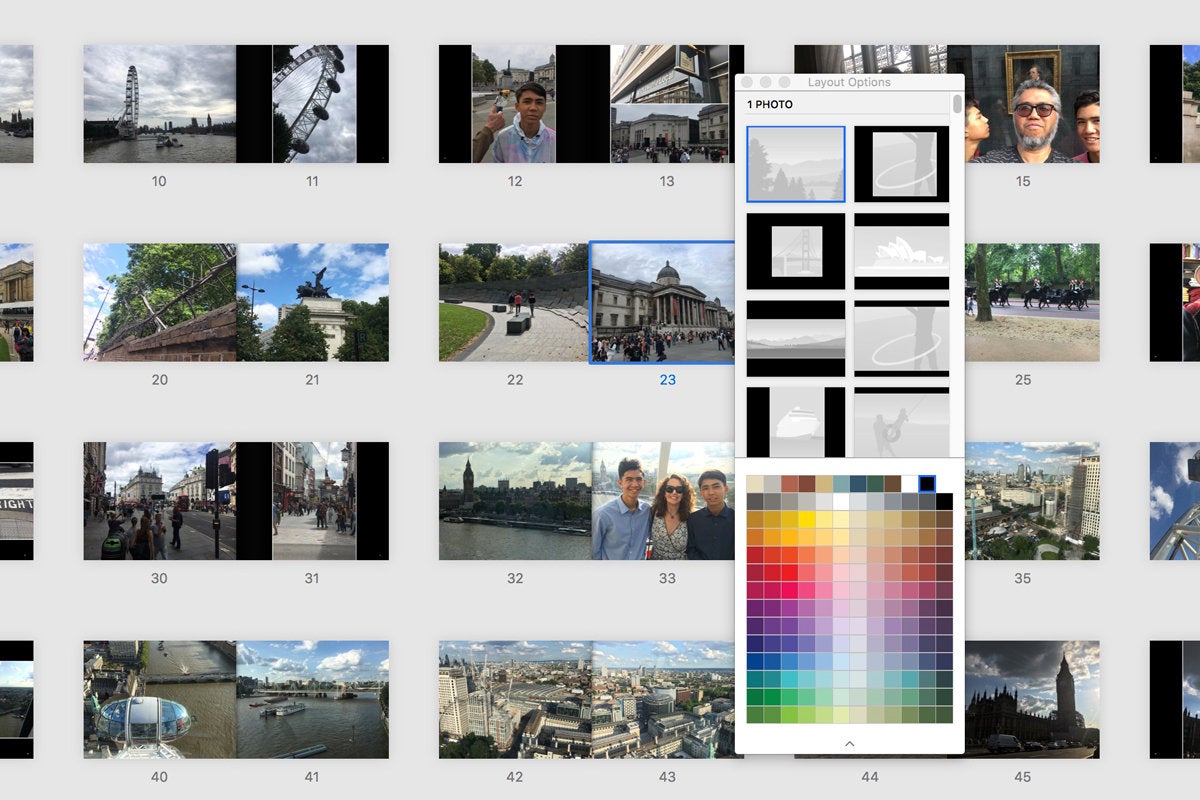 IDG
IDG How to delete a page
Select the page you want to delete and press the Delete key on your keyboard. You'll have to confirm that you want to delete the page.
To delete multiple pages, hold down the Command key and select the pages. To select several pages in a row, hold down the Shift key, then click on the first and last pages you want to delete. Then press the Delete key.
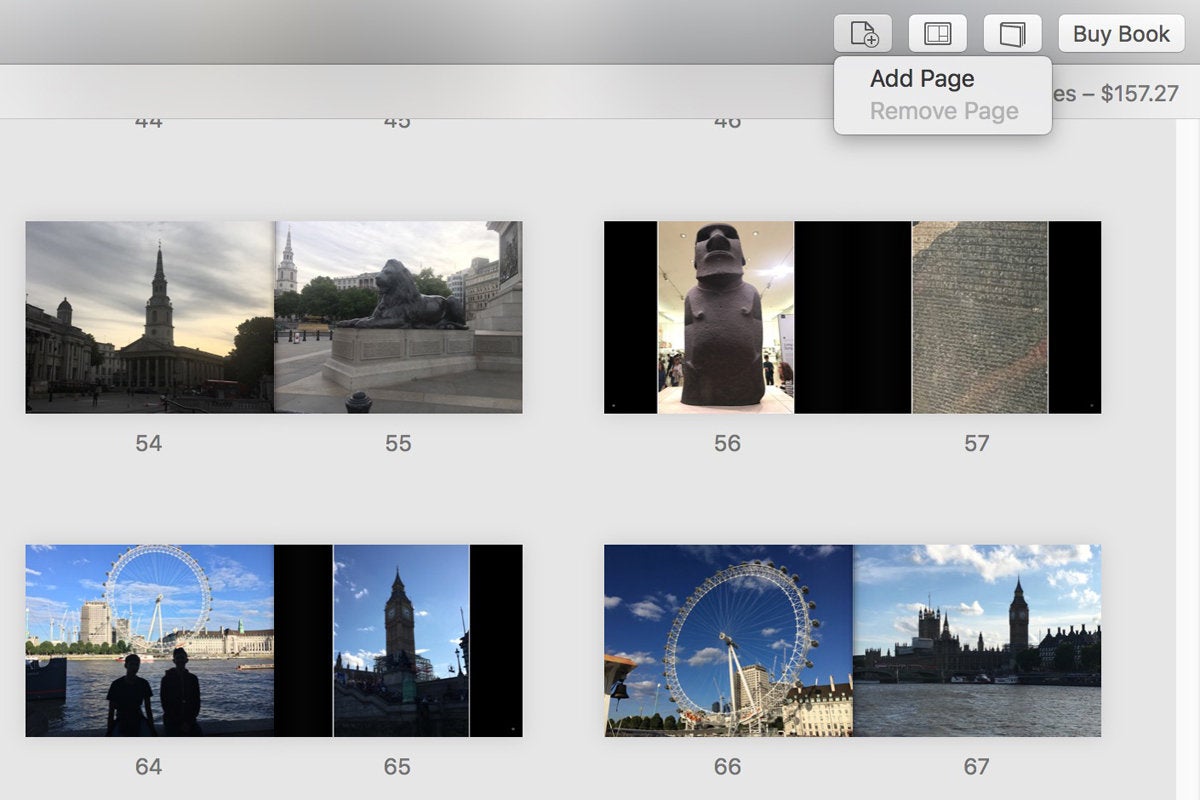
How to add pages
To add pages, click on the Add Page icon in the upper right. You can also use this button to remove a page if you have the page selected.
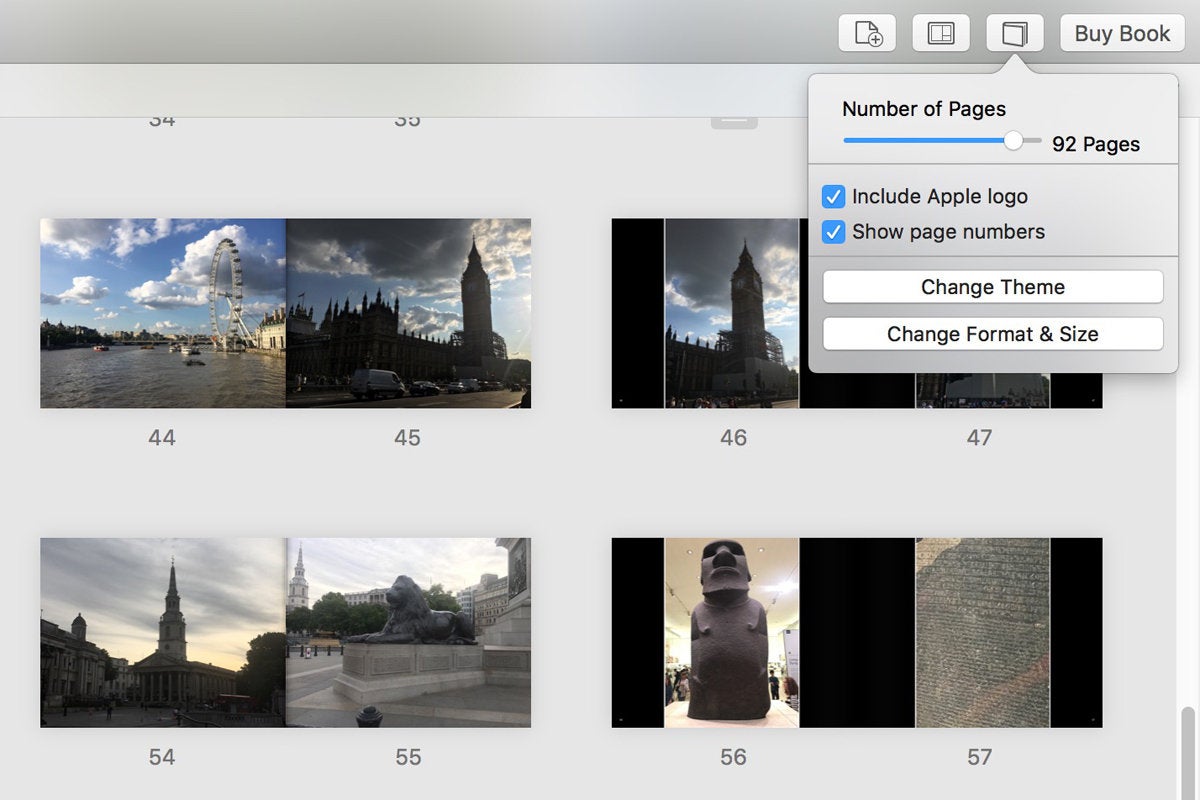
 IDG
IDG If you want to add multiple pages, click on the book settings icon, which is the icon next to the Buy Book button. Adjust the Number of Pages slider to the desired paged number.
 IDG
IDG How to remove the Apple logo
Apple adorns the books it prints with an Apple logo on the inside of the back cover. To remove it, go to the book settings (the book icon next to the Buy Book button). Uncheck the box for Include Apple logo.
How to change the book's theme
Go to the book settings (the book icon next to the Buy Book button). Click Change Theme button.
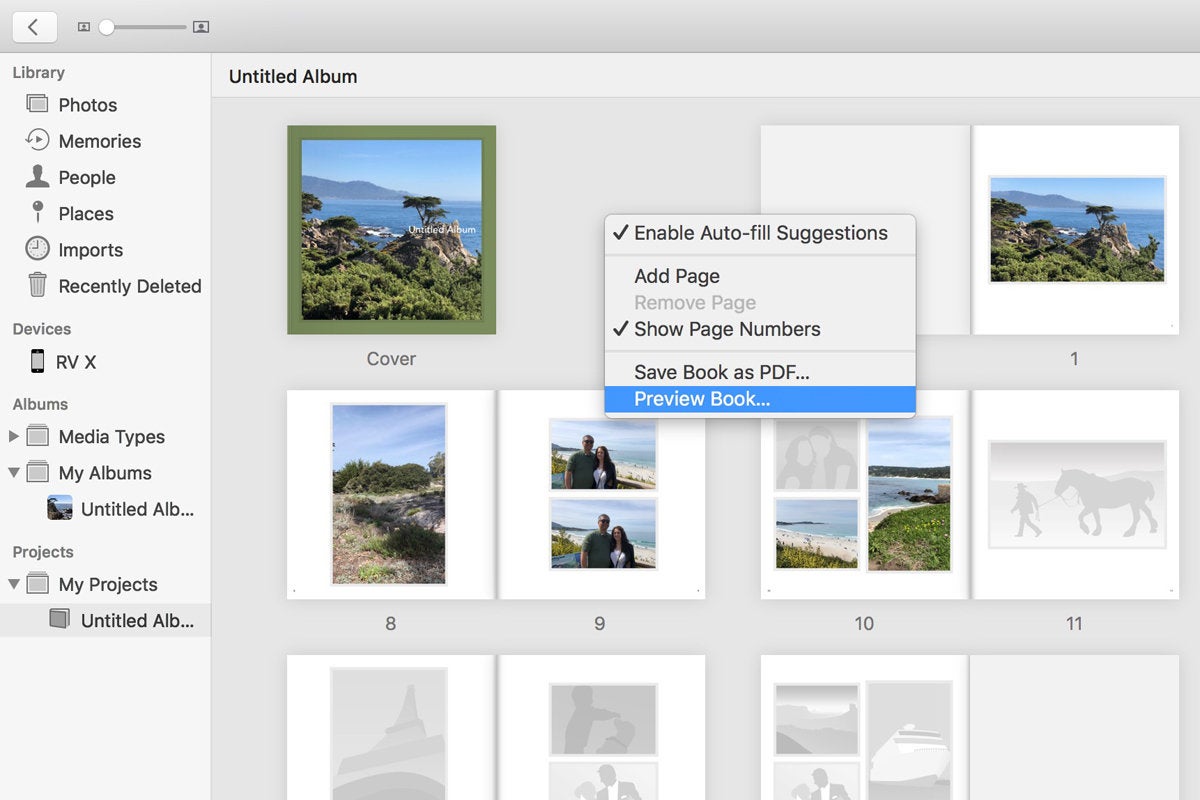
How to preview a book
In the main window, right-click on the area surrounding the pages. In the pop-up menu that appears, select Preview Book. The app will then create a PDF that will automatically open in the Preview app. You can then peruse the book and check the pages.
 IDG
IDG How to save a photo book as a PDF
Photos lets you save a book as a PDF, in case you want to use a different publisher for printing. To save a PDF, you can perform a preview as described above, and then in the Preview app, save the file.
The direct way to do it in Photos is to right-click on the area surrounding the pages in the main window, and then select Save Book as PDF in the pop-up menu.
How to order a photo book
When you book is ready, you can order it by click on the Buy Book button in the upper right of the app. Photos will point out any problems in your book, and you'll have the opportunity to fix them before you place an order.
Descri Tion of Different Themes Options for Apple Picture Books
Source: https://www.macworld.com/article/231310/how-to-create-a-photo-book-in-apple-photos-for-mac.html